
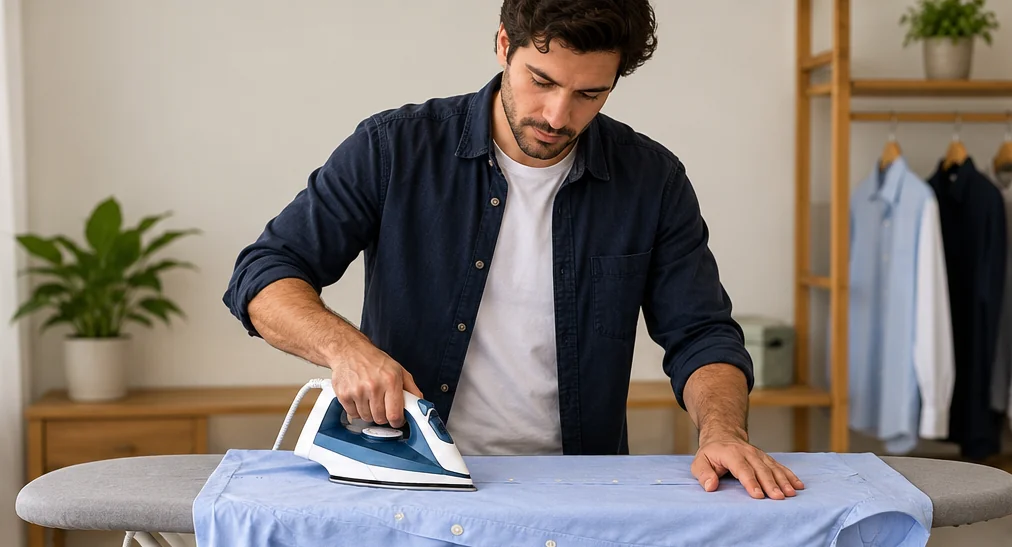
Quick answer: To iron a button-up shirt, check its care label, unbutton it, and use the correct heat setting. Press the collar, cuffs, and sleeves first, then the shoulders, back, and front panels. Use light moisture only if the fabric permits it, avoid ironing over buttons, and hang the shirt immediately so it cools without fresh creases.
This practical UK menswear guide explains how to iron a shirt safely, including sleeves and collars, different fabrics, a quick routine, and alternatives for when you have no iron.
Table of Contents
What you need before starting
Gather a clean shirt, a stable ironing board, a working iron, a hanger, and—if the care label permits—a little water or steam. A clean, thin cotton pressing cloth helps protect delicate, dark, or printed materials. Never place a hot iron directly on an unprotected table or leave it face-down on fabric.
Check for stains before applying heat; ironing can make some marks harder to remove. Empty the pockets, undo every button, and lay the garment flat. If you’re ironing several shirts, start with those that require lower temperatures so the soleplate doesn’t need to cool between garments.
For office outfits where a crisp collar matters, our business casual shirt guide explains which shirt fabrics and collars tend to look polished. Pressing improves presentation, but it can’t fix a shirt that doesn’t fit.
Choose the right iron setting for your shirt fabric
The sewn-in care label takes precedence over any generic fabric chart. The iron symbol usually has one, two, or three dots, indicating low, medium, and high heat. A crossed-out iron means the garment must not be ironed. A no-steam marking means avoid steam even if the fabric seems sturdy.
| Fabric | Starting approach | Extra care |
|---|---|---|
| Cotton dress shirt | Often medium-high or high, only if label allows | Light moisture helps release creases |
| Linen | Often high, only if label allows | Work while slightly damp, accept some natural texture |
| Polycotton | Usually moderate temperature | Follow the blend’s lowest permitted heat |
| Polyester or stretch blends | Low or medium, according to label | Use a pressing cloth; excessive heat may damage fibers |
| Printed or delicate shirt | Label-led low heat | Turn inside out and protect prints from direct contact |
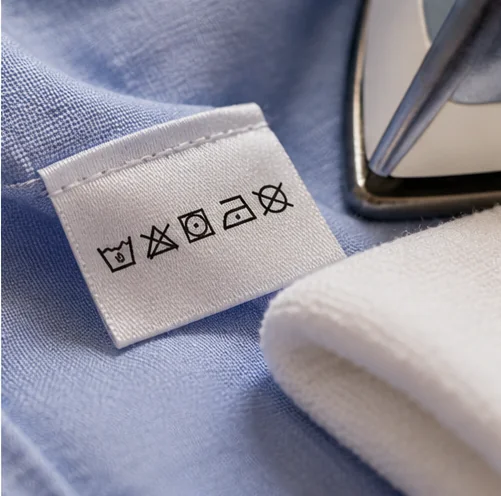
Iron settings are approximate unless you know your specific appliance. Consult the official Philips shirt-ironing guidance for another manufacturer-backed explanation of heat symbols and a step-by-step technique. If you’re unsure, test a hidden area with lower heat first.
Seven-step shirt-ironing method
Use this order for a typical men’s button-up shirt: collar, cuffs, sleeves, yoke, back, front panels, then hang. Working through the smaller structured sections first reduces the chance of undoing your previous work. This is a practical way for beginners to learn how to iron a shirt.
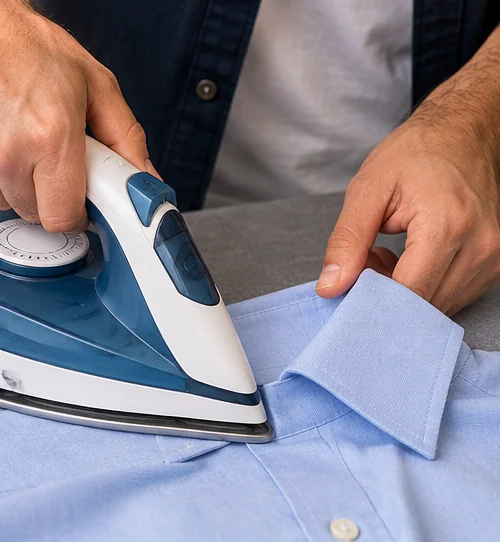
Step 1. Press the collar
Open the collar fully and lay it flat, underside facing up. Smooth the cloth with your free hand, keeping your fingers safely ahead of the hot soleplate. Gently press from each pointed end toward the center, then turn it over and repeat. Let the collar rest flat while the shirt cools.
Step 2. Flatten the cuffs
Unbutton each cuff and open it completely. Press the inside first and then the outside, keeping the soleplate clear of buttons. For double cuffs, unfold them before pressing. If you’re dressing for a formal event, see our guide to wearing cufflinks for how to fasten them after the shirt is pressed.
Step 3. Iron both sleeves
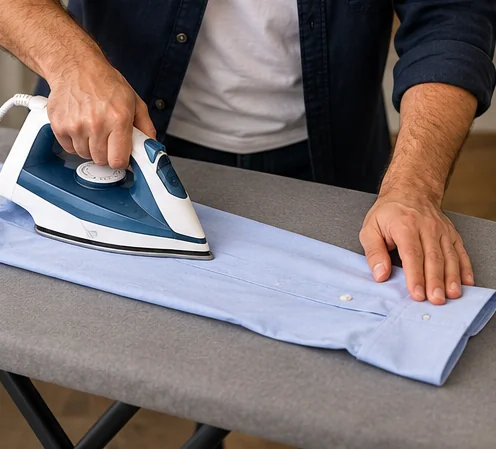
Lay one sleeve flat, aligning the underarm seam neatly. Smooth both fabric layers, then press along the sleeve from shoulder to cuff. Turn it over and repeat. If you don’t want a sharp line down the sleeve, stop just short of the folded edge and reposition the material instead of pressing a deep crease.
Step 4. Press the shoulder yoke
Drape the shoulder area over the pointed end of the ironing board. Flatten one shoulder at a time, pressing small sections rather than stretching the seams. Work carefully around the collar stand to avoid creating new folds.
Step 5. Smooth the back panel
Lay the back of the shirt flat on the board, iron in smooth strokes, and rotate the garment to cover the full width. Lift and reposition the fabric instead of ironing over a trapped fold repeatedly.
Step 6. Finish both front panels
Start at the placket and work carefully between, not over, the buttons. Press each front panel from the shoulder towards the hem. If there is a chest pocket, lift the surrounding fabric and work from its edges to avoid new creases.
Step 7. Hang it straight away
Place the shirt on a broad hanger, fasten the top button to keep the collar in shape, and allow the garment to cool and dry before putting on a jacket or folding it. Switch off and unplug the iron, leave it upright to cool safely, and follow your model’s instructions for its water tank.
This method is useful for everyday Oxford and formal dress shirts. For styling after the shirt is ready, see business professional attire and professional casual outfits.
A five-minute pressing routine for busy mornings
Five minutes is possible with practice, but not guaranteed—especially on thick cotton or heavily creased fabric. Prioritize the areas people notice: collar, cuffs, and visible front panels. If you have more time, finish the sleeves, yoke and back as above.
- First minute: check the heat setting, dampen stubborn cotton creases lightly, and position the shirt.
- Second minute: flatten the collar and cuffs.
- Third minute: smooth the sleeves enough to remove obvious ridges.
- Fourth minute: press both front panels, especially beside the buttons.
- Fifth minute: check the visible back or shoulder area and hang immediately.
Don’t rush the safety checks or set the iron too hot to save time. A good habit is to hang shirts right after washing and dry them to reduce tight creases. For a ready-to-wear office outfit, compare the options in our business casual clothes shopping guide.
How to remove shirt wrinkles without an iron
The best iron-free option is usually a garment steamer, if the care label permits steaming. Hang the shirt securely, keep your hands out of the steam path, and move the steamer as the manufacturer directs. Gently pull the hem to keep the cloth straight; don’t steam a shirt you’re wearing.
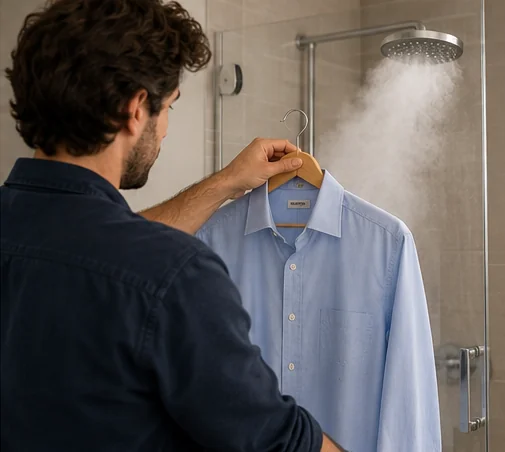
Shower steam: Hang the shirt on a secure hook away from the water stream and away from electrical appliances. Warm humidity may soften minor wrinkles while you shower, but it is less reliable than pressing and may leave the shirt damp. Allow it to dry completely before wearing.
Light water mist: For a washable fabric, lightly mist the creased area, smooth it with clean hands, then hang it until fully dry. Check the label first; don’t soak delicate fibers or dyed garments. A wrinkle-release spray can also help if its label says it is safe for the fabric. Never use a hair straightener or other improvised hot appliance on clothing without a suitable, tested method and the manufacturer’s instructions.
The goal is presentability, not perfectly sharp collar edges. If you need a particularly formal result for a meeting or celebration, ironing or professional pressing is more dependable. Our men’s business-casual shirt styling guide has examples of shirts worn open-collar.
Can you iron a shirt without an ironing board?
A proper ironing board is safest and most convenient because it provides a stable, heat-resistant padded surface. If one isn’t available, use only a flat surface rated for ironing temperatures, with a proper heat-resistant ironing mat, and follow the mat manufacturer’s instructions. An ordinary towel over a wooden table, bed or worktop may not prevent heat damage.
Keep the iron’s cord away from walkways and children, place it on a heat-safe rest, and never leave it unattended while hot. If you don’t have a safe surface, use a steamer or hang the garment instead of improvising.
Dress shirts, T-shirts, polos, linen and printed fabrics
Cotton dress shirts
Work while lightly damp, if the care label allows. Collar and cuffs benefit from careful pressing; use the seven-step sequence to avoid re-creasing the body. A pressed shirt complements an office look, but buying a fabric you enjoy wearing matters too.
Polo shirts and T-shirts
Turn graphic T-shirts inside out, start on a low setting, and keep a pressing cloth between the iron and any print. For a polo, lay the collar flat and gently reshape it without forcing a dress-shirt-style sharp edge. See our men’s short-sleeve shirt guide for when casual tops suit different occasions.
Linen shirts
Linen often responds well to moisture and steam where permitted, but some natural wrinkles are part of its character. Work in small sections, keep the iron moving, and hang the shirt before it fully cools.
Dark or striped shirts
Press inside out or through a clean cloth where appropriate to reduce the risk of shine. Avoid excessive direct heat on dark fabrics and printed stripes. Our black shirt styling guide and black-and-white striped shirt ideas offer styling suggestions for shirts once they are ready to wear.
How to deal with stubborn creases, shine and new wrinkles
If a crease won’t disappear: check the fabric label again, use a little moisture only if allowed, smooth the cloth fully, and repeat in controlled strokes. Don’t immediately turn the temperature to maximum. A hidden inner seam is a sensible test area.
If the iron leaves shiny marks: stop direct pressing, let the shirt cool, and use a pressing cloth or the reverse side for future work. Some heat damage cannot be reversed. If a button is trapped under the soleplate, lift the iron and reposition rather than sliding across it.
If wrinkles reappear while wearing: make sure the garment has cooled and dried before you put it on. Avoid cramming pressed shirts tightly into a wardrobe. A shirt with insufficient chest or waist room can also pull and crease quickly; a versatile wardrobe starts with a good fit, as explained in our men’s capsule wardrobe guide.
Frequently asked questions
How long does it take to iron a shirt?
Allow roughly five to ten minutes for a typical button-up shirt once the iron is ready. Beginners or thick, badly creased shirts may take longer, while experienced ironers can be quicker. Safety and the garment’s care label come first.
Should you iron the collar or sleeves first?
A reliable sequence is collar, cuffs, sleeves, shoulders or yoke, back, then the front panels. Several manufacturers use slight variations, but beginning with small structured parts is convenient.
Can you use shower steam instead of an iron?
Warm bathroom humidity can soften minor creases, but it is not an equally effective substitute for pressing. Hang the shirt clear of water and electrical equipment, and let it dry fully before wearing.
How do you avoid a crease down the sleeve?
Smooth the sleeve flat first and avoid pressing directly along the folded outer edge. Reposition the sleeve as you work, or use a sleeve board for a more rounded finish.
Can you iron a printed T-shirt or polo shirt?
Only if its care label permits ironing. Turn it inside out, use a low heat setting, and use a pressing cloth, and avoid direct heat on printed designs, transfers, and logos.
Not sure what to wear?
Use our Men's Outfit & Dress Code Generator to get a personalised outfit based on your occasion, workplace and weather.
Try the Outfit Generator →